Chasing the Light: How Time of Day Shapes Your Travel Photos
Light can flatter, challenge, or surprise. Learn how to work with different conditions to add depth and mood to your travel photography.
- 5 min read

Light is the raw material of photography. Wherever you travel, the time of day will shape not just how a place looks in your photos, but how it feels. Below are some practical tips for working with natural light in different conditions.
Sunrise
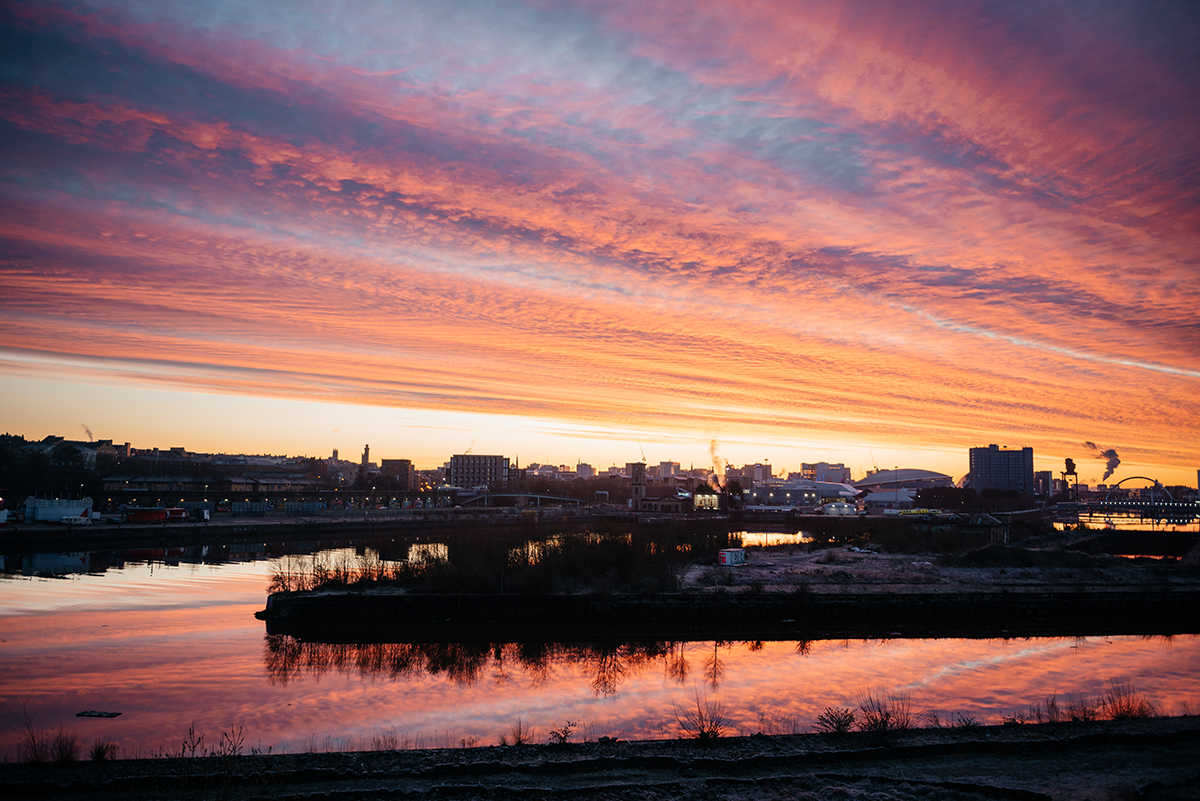
Golden sunrise over the River Clyde in Glasgow, where vibrant clouds paint the sky and their colors reflect beautifully on the water.
Dawn often fills the sky with vivid colors, and water reflections can make the scene even more striking. Light changes quickly from soft pastels to bright highlights, so adjust exposure fast. Use a tripod before the sun rises, and keep ISO low for clean shots. To balance the bright sky with darker foregrounds, try a grad ND, bracketing, or recover details later from RAW files.
Suggested Settings
- Tripod for pre-sunrise: ISO 100–400, f/5.6–f/8, 1–5 s (bracket if needed)
- As light builds: ISO 100–200, f/8, 1/125–1/500 s
- WB: Daylight or Cloudy to keep warmth
Field Tips
- Arrive 30–45 min before posted sunrise.
- Use grad ND or exposure bracketing to balance bright horizon vs dark foreground.
- Use reflections in rivers, lakes, or puddles to enhance the mood.
Golden Hour (After Sunrise / Before Sunset)
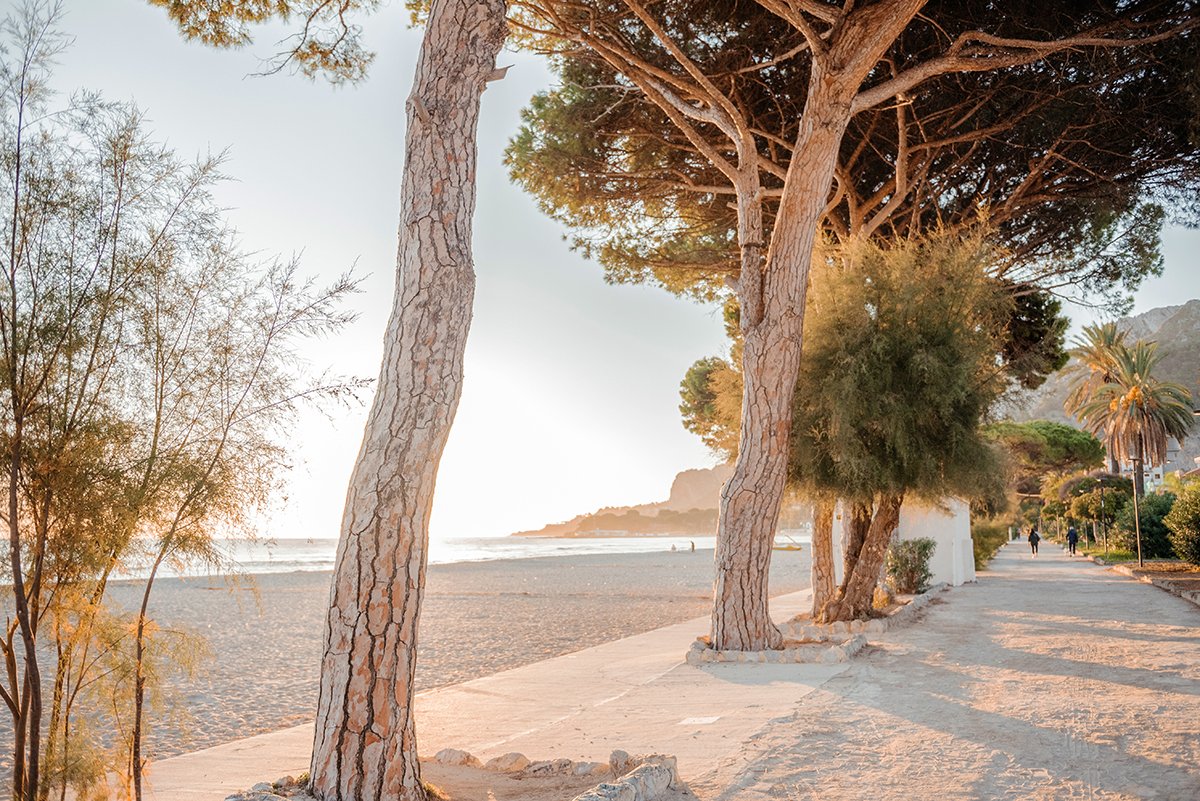 Soft golden-hour light filters through the pine trees at Mondello Beach, casting long shadows across the promenade and bathing the Sicilian coastline in warm tones.
Just after sunrise and just before sunset, light turns warm, directional, and forgiving. It wraps gently, stretches shadows, and adds depth and glow to skin, foliage, stone, and city scenes. Work fast—the character of the light can change minute to minute. Backlighting can produce beautiful rim light in hair, grasses, and trees, while a small aperture toward the sun creates crisp starbursts. Morning golden hour tends to feel clearer and a touch cooler; evening often runs deeper and more saturated as dust and humidity build.
Suggested Settings
- ISO 100–200, f/2.8–f/5.6 for subject isolation; 1/250–1/1000 s
- For sunstars: f/16 and faster shutter as needed
- WB: Cloudy/Shade to enhance warmth (or shoot RAW and decide later)
Field Tips
- Work fast—light changes by the minute.
- Place the sun just outside the frame for controlled flare.
- Use a reflector (or pale wall) for subtle fill on faces.
Midday (High Sun)
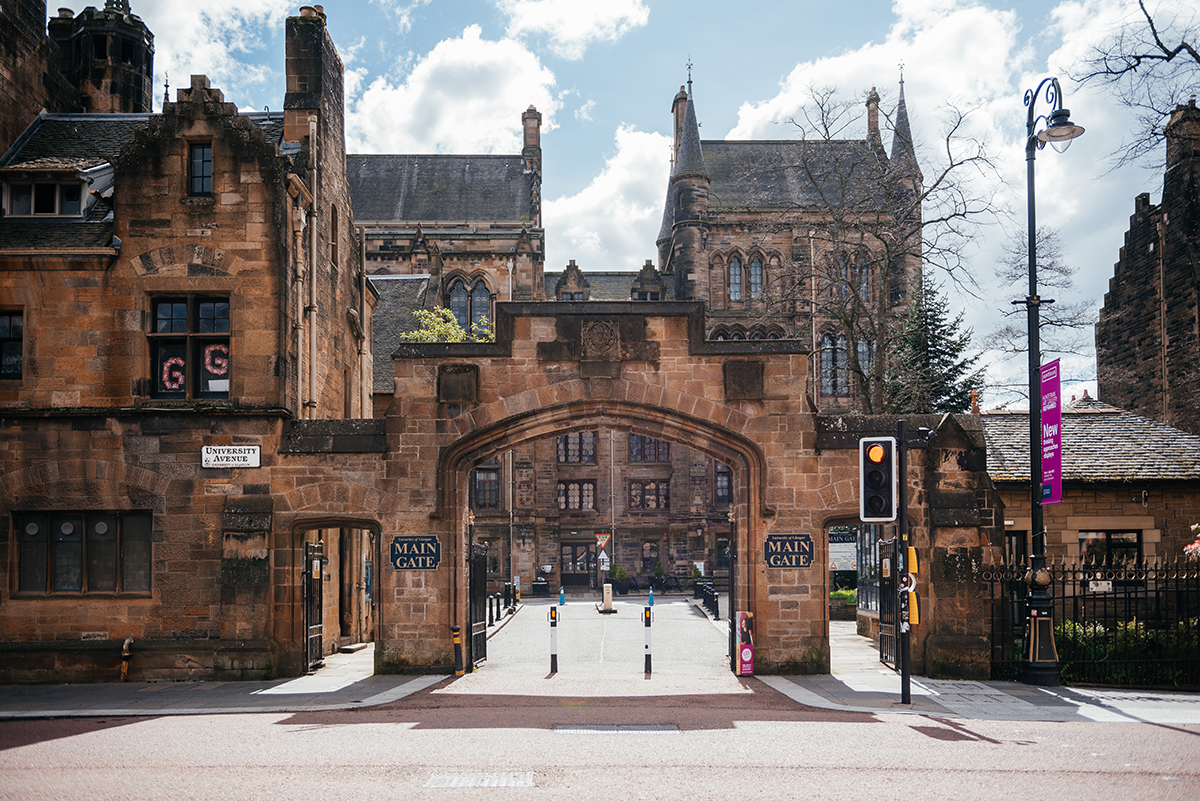 The Main Gate of the University of Glasgow, captured at midday when the sun is high. Strong light creates sharp contrasts and highlights the textures of the sandstone architecture.
With the sun high overhead, midday light is hard, bright, and often neutral in color. It creates short, crisp shadows and strong contrast that can be challenging for portraits but works well for architecture, street scenes, and bold graphic compositions.
Suggested Settings
- ISO 100, f/8–f/16, 1/1000 s+ (Sunny 16: f/16 at 1/ISO)
- Polarizer to enrich blue skies and reduce glare on windows
- Consider bracketing for high-DR scenes
Field Tips
- Use shadows as design elements—arches, windows, and streets gain graphic strength.
- Position yourself at a slight angle to the sun to bring out architectural texture.
- If color looks harsh, try B&W for form and contrast.
Sunset
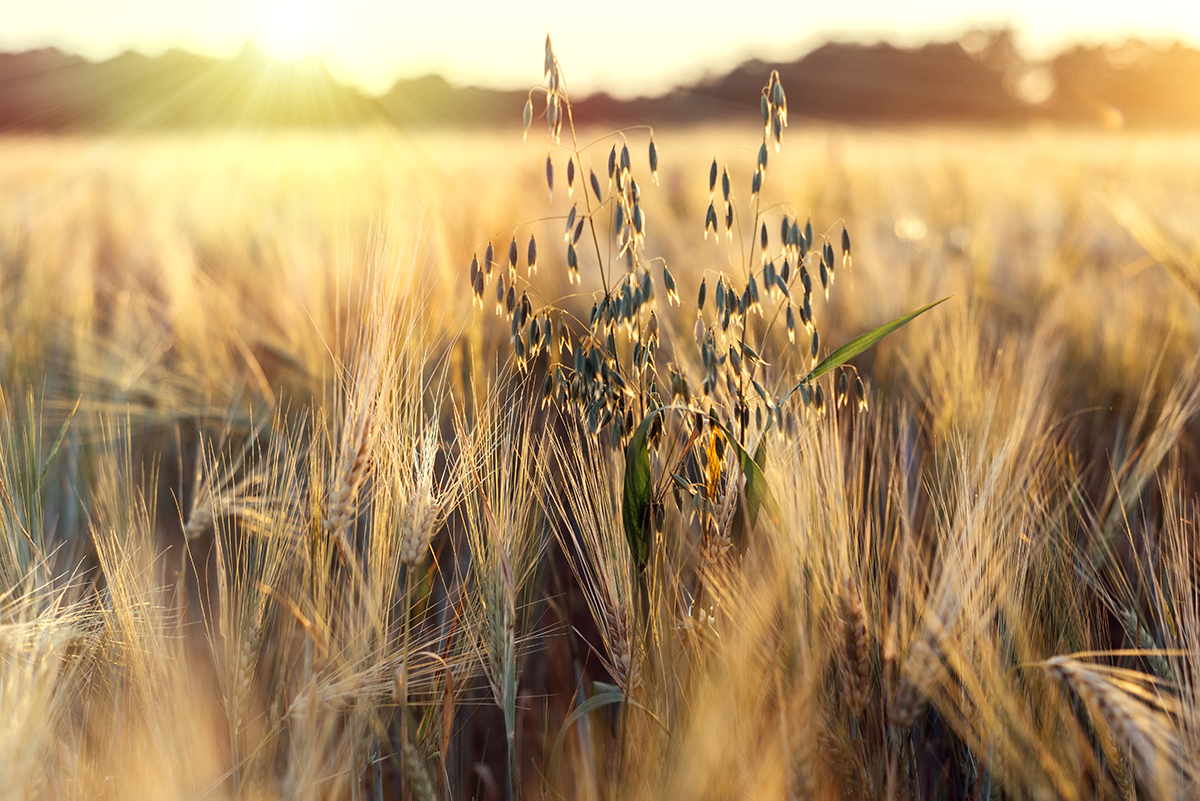 Sunset over a Ukrainian wheat field, where golden stalks glow in the fading light.
Sunset brings warm, soft light that enhances color and creates long shadows across the landscape. It’s one of the easiest times of day to capture pleasing tones without harsh contrast. Shooting with backlit light at sunset can be especially powerful. Positioning your subject between you and the sun creates glowing edges, emphasizes translucency in elements like wheat or leaves, and adds depth through contrast.
Field Tips
- Arrive 15–20 minutes early — the best color often appears just before and just after sunset.
- Use backlighting to give edges of wheat, leaves, or hair a warm glow.
- Try exposure bracketing to balance bright skies with darker foregrounds.
Blue Hour (Civil/Nautical Twilight)
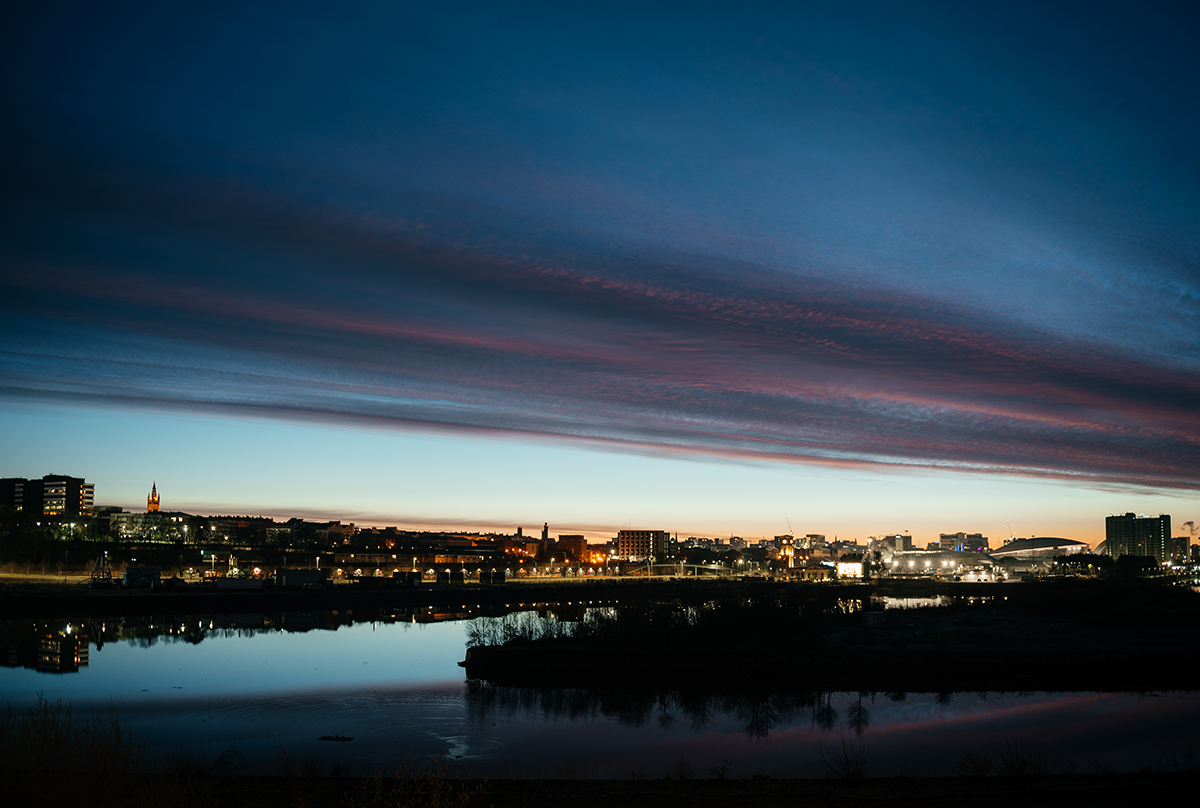 The Glasgow skyline during blue hour, when warm city lights contrast with the deepening blue sky.
Before sunrise and after sunset, the sun drops below the horizon and the world slips into cool, cobalt tones. Contrast is low, shadows are soft, and the cool blue sky makes the warm city lights stand out vividly. This mix of natural and artificial light creates a cinematic mood that works especially well for skylines and reflections on water.
Suggested Settings
- Tripod. ISO 100–400 for long exposures.
- f/5.6–f/11; 2–30 s typical; remote/timer to avoid shake
- Mixed WB: let warm lights stay warm against the blue
Field Tips
- Arrive before sunset; compose while brighter.
- Shoot a quick exposure bracket to hedge against changing light.
- Use rivers, glass, or wet surfaces for mirror-like reflections.
Practical Kit & Setup
- Tripod + remote/timer: Blue hour, twilight, waterfalls, traffic trails.
- Filters: Polarizer (glare/sky), 3-stop grad ND (dawn/dusk horizons), 6–10 stop ND (daytime long exposures).
- Small reflector/diffuser: Midday portraits; keep faces clean.
- Microfiber + lens hood: Flare control and quick cleaning.
FAQs
Is sunrise or sunset better?
Sunrise: cleaner air, fewer people, chance of mist. Sunset: often richer dust-driven color, but busier locations.
How long is golden/blue hour?
Varies by season/latitude. Roughly 30–75 min each; winter gives longer twilight at higher latitudes.
Shoot RAW or JPEG?
RAW for flexibility with white balance and highlight recovery—especially at dawn/dusk/blue hour.